Proof of Freedom
Pre-border measures and border control protocols constitute critical components in mitigating biosecurity risks, although complete threat elimination remains unattainable. In regions potentially exposed to biological threats, regulatory authorities implement comprehensive surveillance systems as their primary risk management framework. These systems are designed to facilitate early detection protocols, enabling authorities to identify and respond to potential outbreaks before they escalate to levels that could precipitate significant economic disruption, social instability, or environmental degradation.
Surveillance systems also serve a crucial verification function, establishing and maintaining documentation of disease-free status within specified regions or area freedom. Statistical “Proof of Freedom” methods are utilised to verify area freedom status give surveillance data. These verification methods are instrumental in both preserving existing trade relationships and facilitating the restoration of market access following biosecurity incidents.
Biosecurity Commons provides a Proof of Freedom (PoF) workflow that enables users to statistically support claims of area freedom given data from surveillance systems. Utilising either temporal detection records or estimated sensitivities (detection probabilities) of surveillance systems, the PoF workflow can be used to determine the iterative confidence in area freedom provided by a surveillance system over time or multiple applications of the system. Alternatively, the workflow can be used to determine the time, or number of reapplications, required for a surveillance system to provide sufficient evidence of area freedom at a specified confidence level (e.g. 95%).
The Proof of Freedom workflow provides two statistical methods for supporting area freedom:
- Hypothesis test PoF: Formulates a hypothesis that the undetected species is still present with probability p, which is calculated iterative using surveillance data. If the probability of presence is sufficiently low (e.g. <= 0.05), then we can reject the hypothesis, thus supporting an area freedom claim (e.g. with 95% confidence)
- Bayesian PoF: Uses Bayes theorem to iteratively calculate the probability, or confidence, of freedom if undetected using surveillance data as well as an estimate of the prior probability of freedom. An uninformed prior of 0.5 will result in similar iteratively increasing confidence as the hypothesis method, whereas prior values greater than 0.5 achieve higher confidence in fewer iterations
For more details, please see the Proof of Freedom workflow support article.
Linkages to other workflows
Proof of Freedom (PoF) results can be used to inform the adequacy of a surveillance design allocation produced via a Surveillance Design workflow. The overall sensitivity of a surveillance design allocation may be utilised as an input in the Proof of Freedom workflow. If inadequate area freedom confidence levels are achieved via PoF analysis of the design, then the surveillance design may need to be revisited and adjusted, such as increasing the surveillance allocation.
Creating a Proof of Freedom Analysis
Step 1. Create a new project
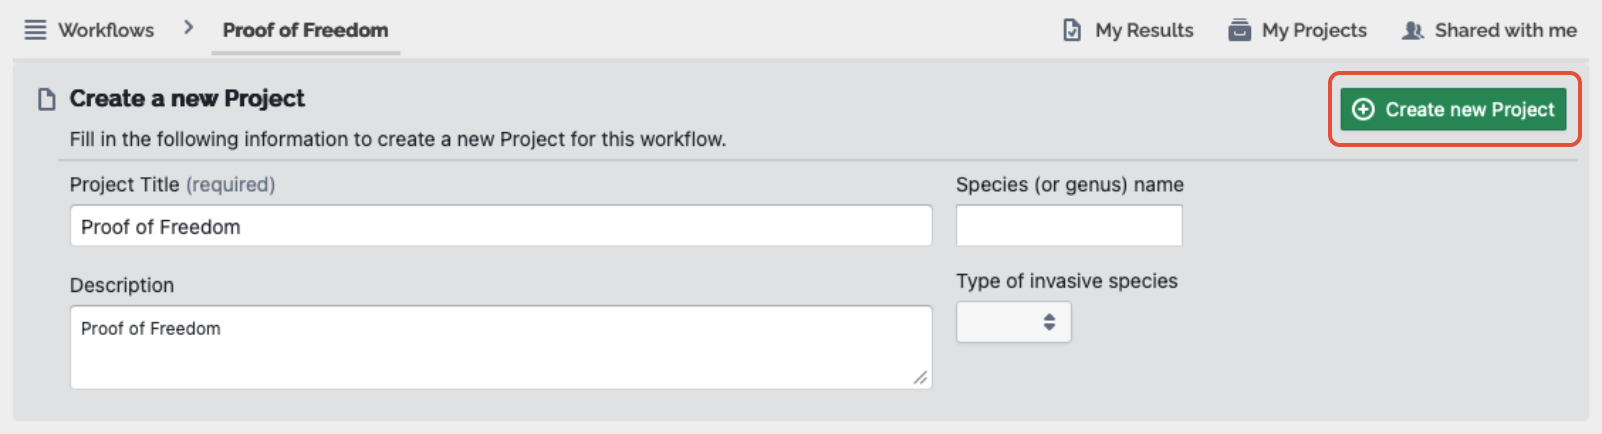
Select the Proof of Freedom (PoF) workflow and then select “Create new Project” (see screenshot below).
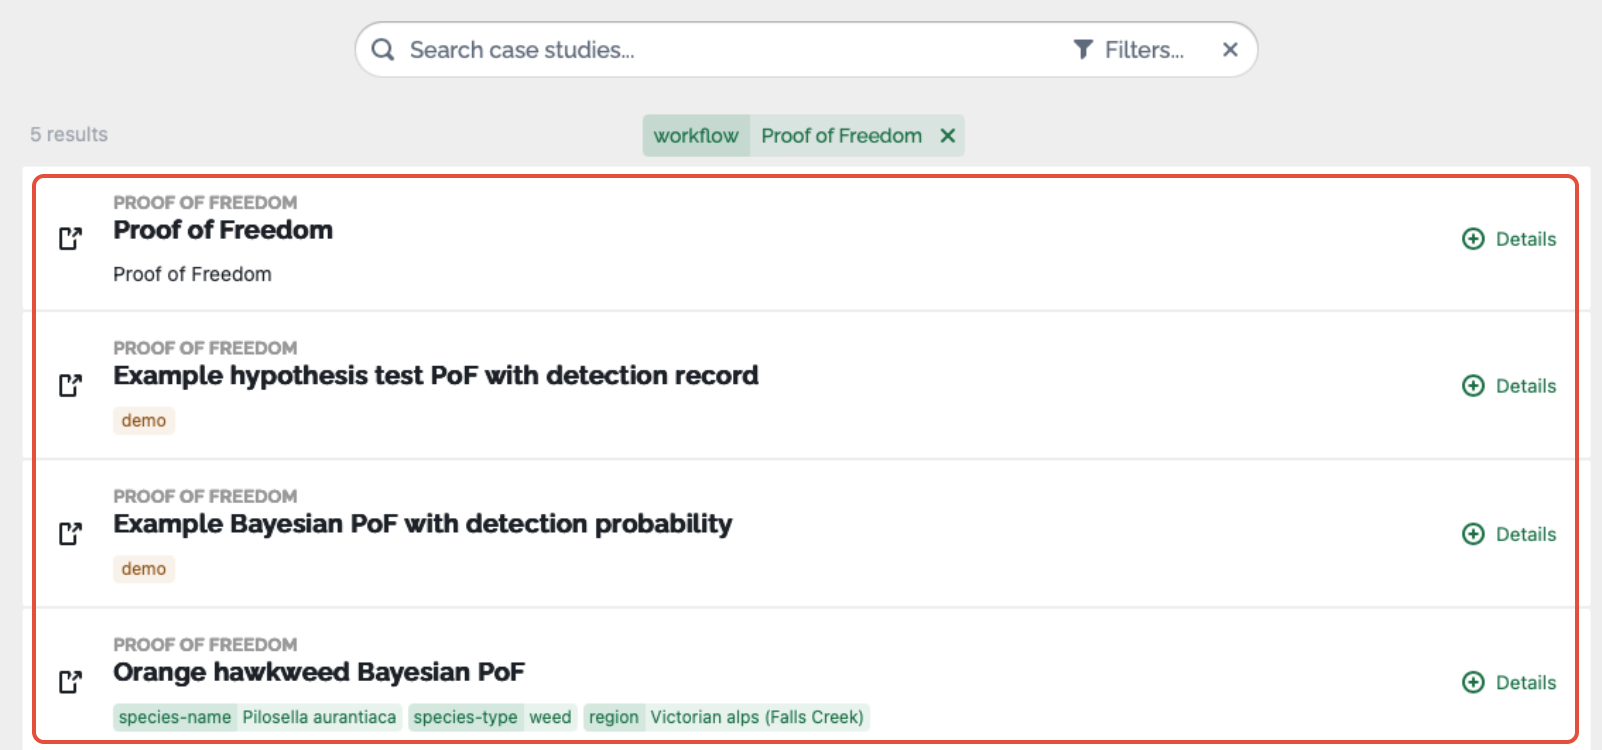
When creating a new PoF project, users can start an empty template, initially titled “Proof of Freedom”, or choose from a range of pre-populated case studies that have been constructed as examples of the workflow or based on previous case studies (e.g. “Mouse-ear hawkweed Bayesian PoF”).
The empty project is ideal for those wishing to create a brand-new Proof of Freedom analysis as it contains:
- The basic structure of the Proof of Freedom workflow
- No preloaded datasets
By contrast, case studies provide users with the opportunity to see a completed demonstration of how Proof of Freedom analyses can be produced, or if based on a real-world case study, how others have attempted to create a model.
Select a case study and then give your project an appropriate title. Users can optionally provide additional descriptive details under the Description, Species name and Species type fields. These metadata are presently unused but will provide future flexibility in filtering and summarising projects.
Once details have been provided, click the green “Create a new Project” button in the bottom right-hand corner to continue.
When you start a Proof of Freedom workflow from an empty project you will be presented with the core elements of the PoF workflow on the left side of the screen – “Context”, “Method” and “Proof of Freedom”. Orange exclamation points indicate steps that require attention and, as you progress through the project, these change to green ticks when complete.
Step 2. Specify your context
Select appropriate details of the context of the surveillance that your PoF is being used to analyse, including:
- Surveillance type: The type of surveillance utilized in the design (e.g. surveys, traps, samples)
- Surveillance quantity unit: The unit to express quantities of surveillance (e.g. units, hours, traps, samples)
- Cost unit: The unit to describe surveillance, management, and/or benefit costs (e.g. $, hours)
- Distance/area unit: Unit for distances or areas where applicable (m or km)
- Time unit: Unit for time measures where applicable (years, months, weeks, days, etc.)
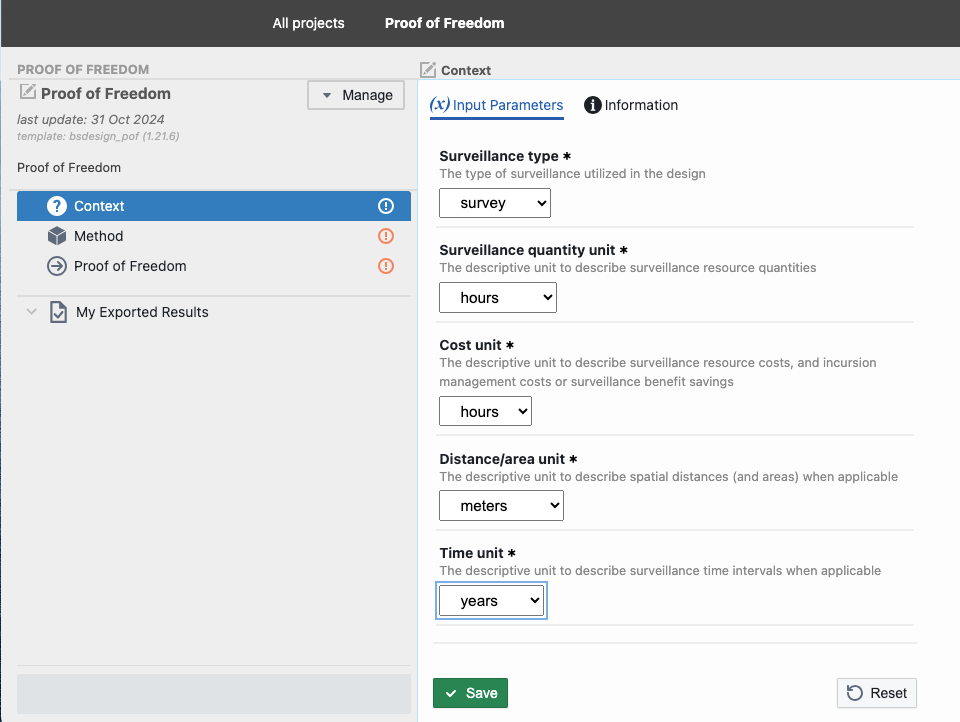
“Save” your selections when finished.
Step 3. Specify your method
Select your Proof of Freedom method. Currently the following methods are available:
- Bayesian freedom design
- Hypothesis testing freedom design
These methods are described in the first section of this document.
Extended Proof of Freedom methods are anticipated in future versions of the Biosecurity Commons platform.
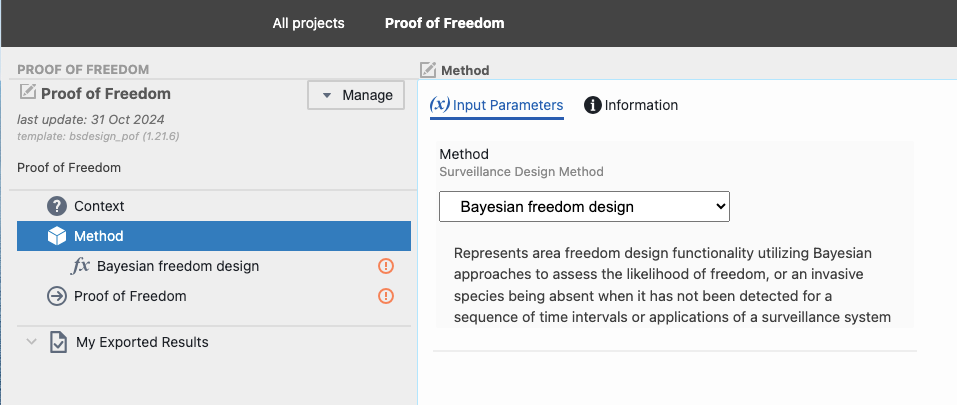
Depending on the Proof of Freedom method the user selects, different options will become available.
1. Bayesian freedom design
Selecting “Bayesian freedom design” will prompt users to specify the following:
- Detection input (required): The type of surveillance data used for the PoF analysis (also determines method alternatives). Choose from:
- Detection record
- Detection probability
Results in dynamic inputs:
- Detection record (when “Detection record” selected): CSV table of temporal recording when the invasive species was detected/sighted at previous intervals
- Probability detect (when “Detection probability” selected): The probability of detecting the invasive species given its presence. Also known as system sensitivity or detection confidence for a surveillance system
- Probability persist (when “Detection probability” selected): The probability that the invasive species persists at each time interval. Default is 1 implies that the invasive species will persist across time intervals if present, representing the worst-case scenario when persistence probability is unknown
- Probability freedom (required): The prior probability of invasive species freedom or absence used in the first iteration of the Bayesian process. Values are typically estimated via expert elicitation. Default is 0.5 for an uninformed prior
- Stopping condition (required): Determines the condition for stopping the iterative PoF process and producing results for each iteration. Choose from:
- Number of iterations
- Target confidence
Results in dynamic inputs:
- Iterations (when “Number of iterations” selected): The number of time intervals, or sequential surveillance system applications, used to estimate the likelihood of area freedom
- Confidence (when “Target confidence” selected): The target confidence level (e.g. 0.95) in area freedom, or the probability of freedom (absence) given a sequence of no detection via a surveillance system
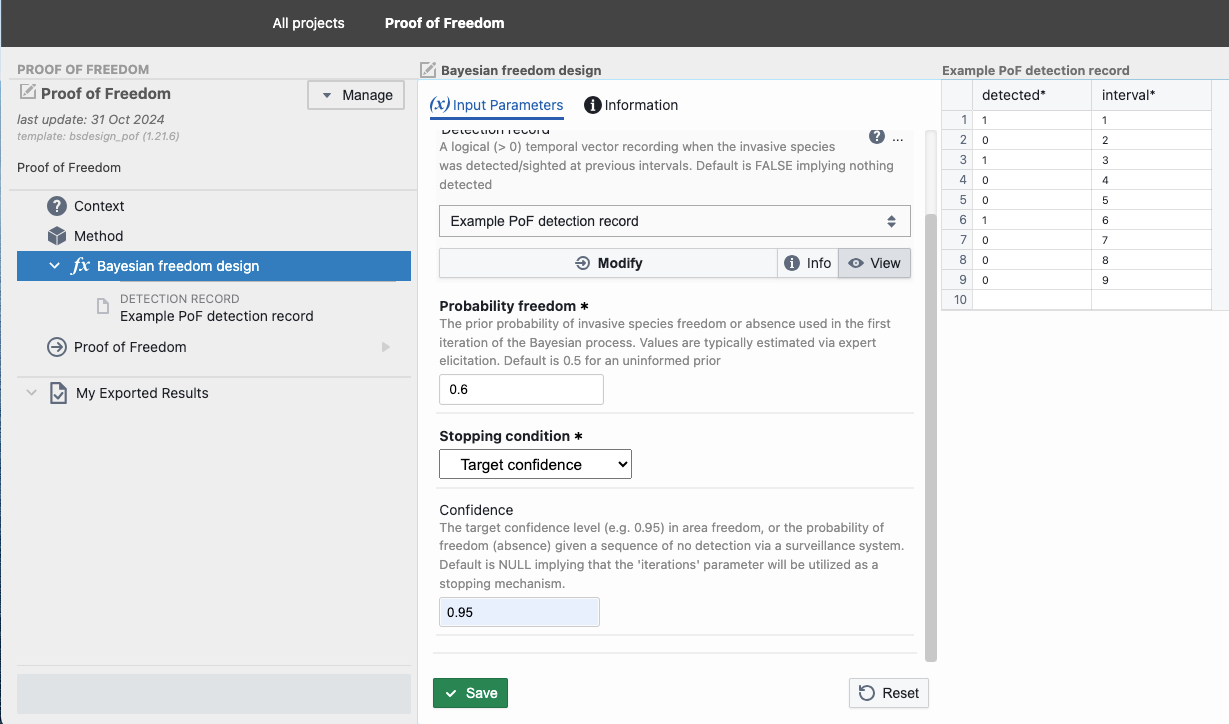
“Save” your selections when finished.
2. Hypothesis testing freedom design
Selecting “Hypothesis testing freedom design” will prompt users to specify the following:
- Detection input (required): The type of surveillance data used for the PoF analysis (also determines method alternatives). Choose from:
- Detection record
- Detection probability
Results in dynamic inputs:
- Detection record (when “Detection record” selected): CSV table of temporal recording when the invasive species was detected/sighted at previous intervals
- Probability detect (when “Detection probability” selected): The probability of detecting the invasive species given its presence. Also known as system sensitivity or detection confidence for a surveillance system
- Probability persist (when “Detection probability” selected): The probability that the invasive species persists at each time interval. Default is 1 implies that the invasive species will persist across time intervals if present, representing the worst-case scenario when persistence probability is unknown
- Probability freedom (required): The prior probability of invasive species freedom or absence used in the first iteration of the Bayesian process. Values are typically estimated via expert elicitation. Default is 0.5 for an uninformed prior
- Stopping condition (required): Determines the condition for stopping the iterative PoF process and producing results for each iteration. Choose from:
- Number of iterations
- Target p-value
Results in dynamic inputs:
- Iterations (when “Number of iterations” selected): The number of time intervals, or sequential surveillance system applications, used to estimate the likelihood of area freedom
- Confidence (when “Target p-value” selected): The threshold probability (e.g. 0.05) for rejecting the null hypothesis that the invasive species remains present given a sequence of no detection via a surveillance system
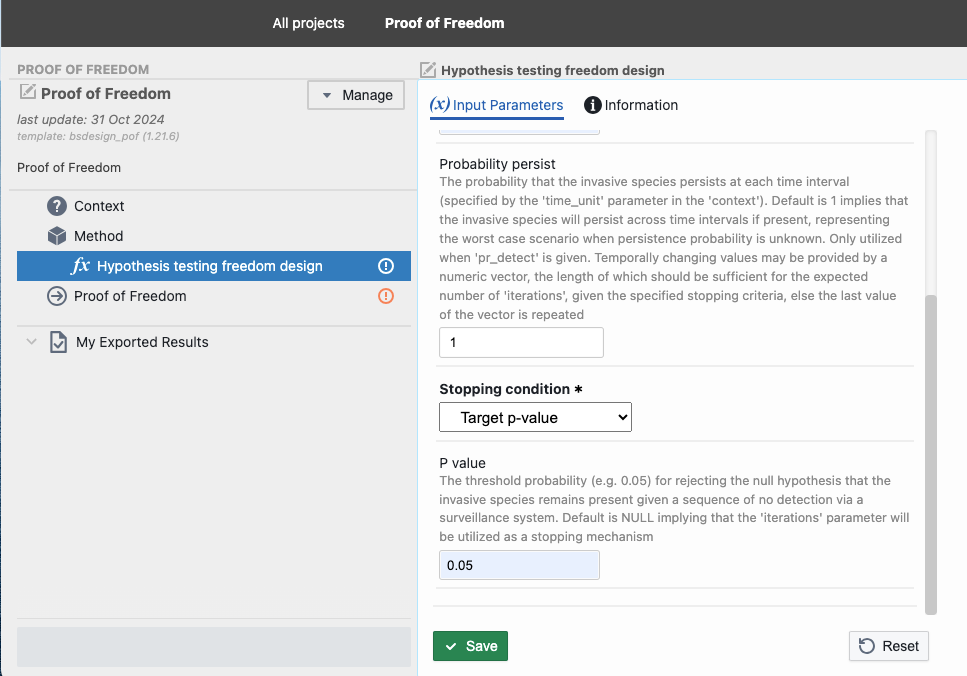
“Save” your selections when finished.
Step 4. Run your Proof of Freedom Design
Once the Context and Method branches have been successfully configured you will be able to run your Proof of Freedom Design, which will calculate the evidence or confidence of area freedom for the appropriate number of iterations, given the stopping condition.
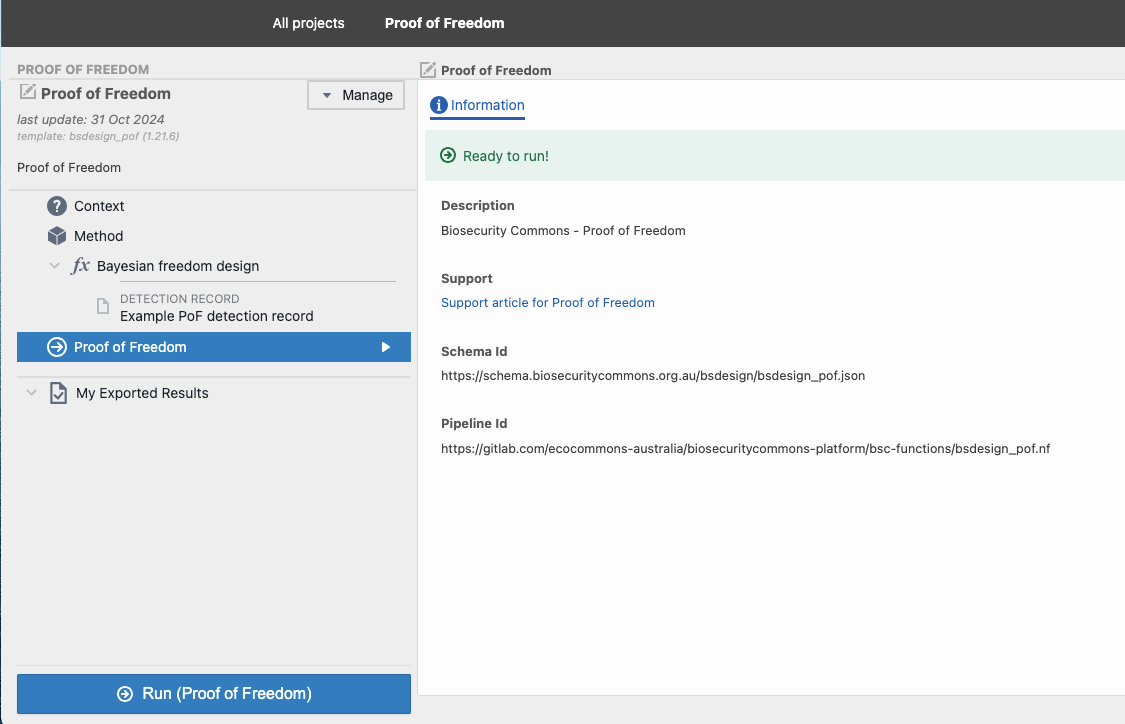
Click the blue ‘Run’ button in the bottom left to run your project. The output page will be updated as the job progresses from “Created”, “Submitted”, “Started” and “Success”.
Once it has finished, a green tick will appear next to Proof of Freedom.
The model output will automatically be displayed as a viewable table in the output pane, either:
- Proof of Freedom - Confidence (if Bayesian method was used): A table of area freedom confidence (probability of freedom if undetected) for each iteration
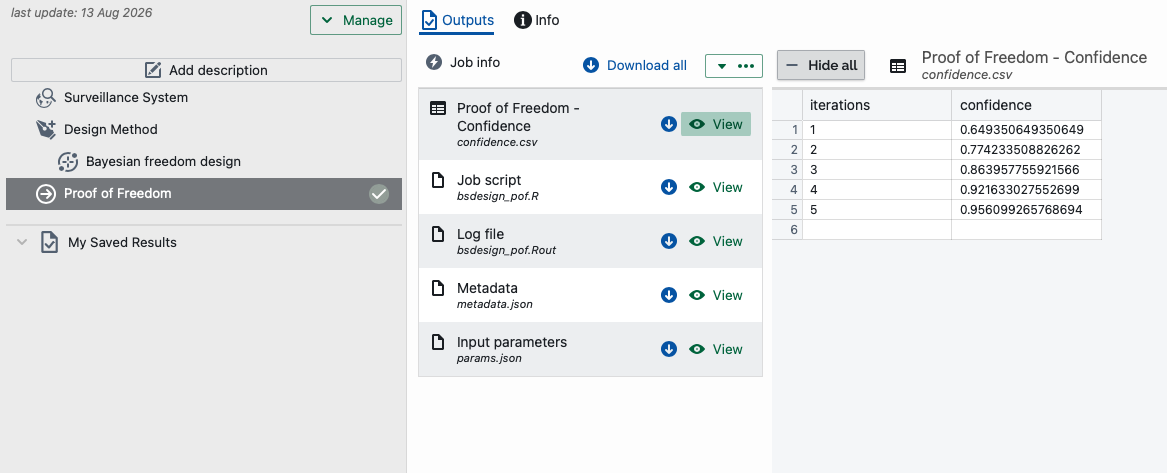
OR
- Proof of Freedom - Evidence (if hypothesis testing method was used): A table of p-values for each iteration, indicating the likelihood of undetected presence, thus providing greater evidence for claiming area freedom as the p-value becomes smaller (less likely)
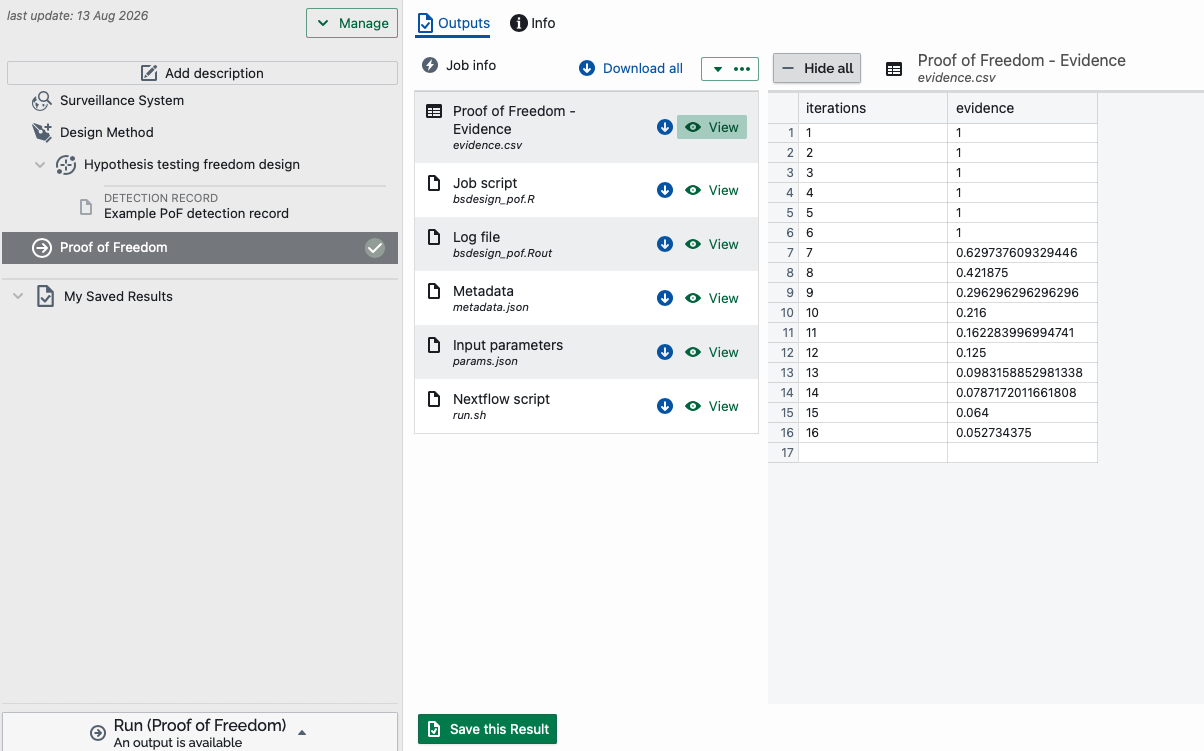
Clicking on the “All data” button allows users to view and download all the outputs.
These sampling surveillance design outputs include:
- Proof of Freedom - Confidence (if Bayesian method was used): A .csv containing the area freedom confidence (probability of freedom if undetected) for each iteration
- Proof of Freedom - Evidence (if hypothesis testing method was used): A .csv containing p-values for each iteration, indicating the likelihood of undetected presence, thus providing greater evidence for claiming area freedom as the p-value becomes smaller (less likely)
- Job script: A copy of the R script used to build the risk map
- Log file: A text file containing processes, messages, and other details associated with model runs
- Metadata: A .json file containing the metadata required to run the model on Biosecurity Commons
- Input parameters (all models): Input parameters required to run the Job Script
Step 5. Exporting outputs for use in other workflows
Users may wish to save outputs for use in other projects or other workflows.
To do this, view the output of interest, and select “Save this Result” in the bottom left corner of the interactive map.
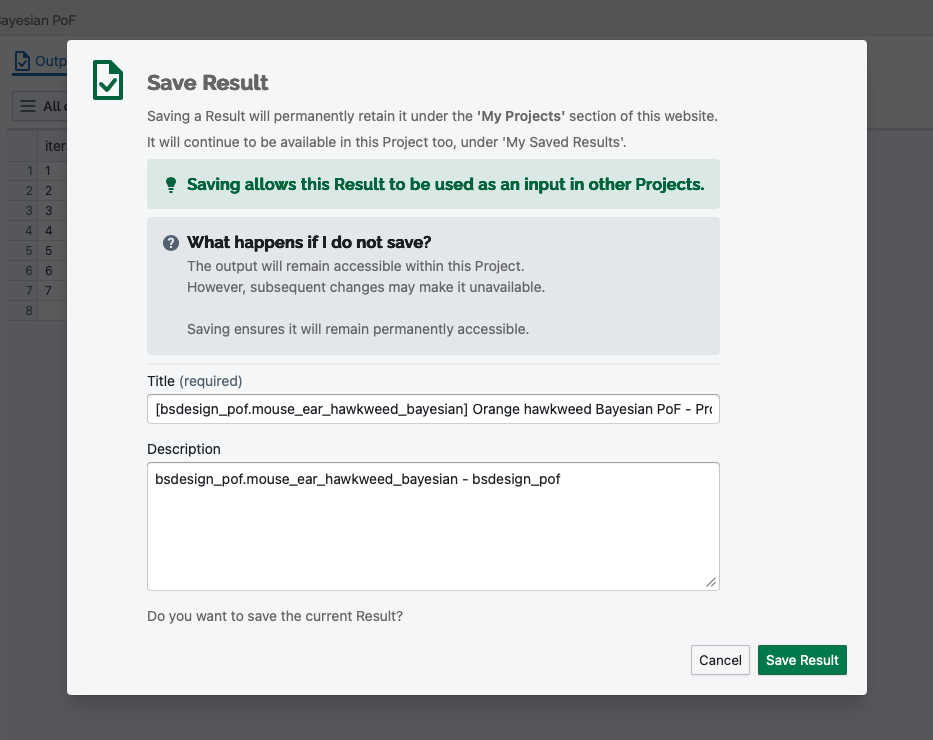
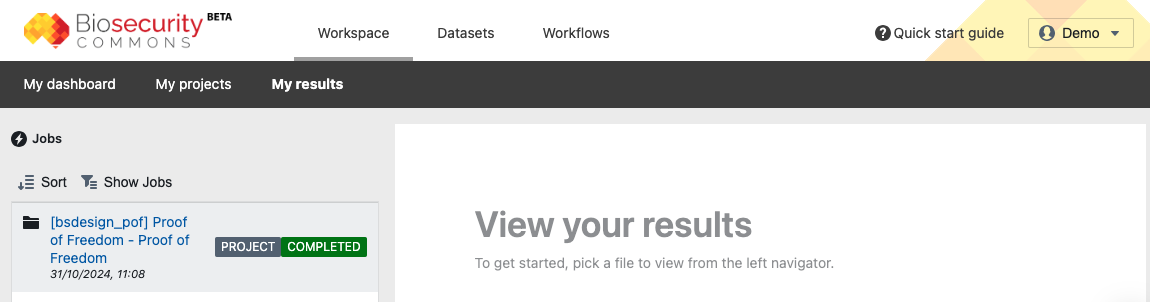
This output will now be discoverable in the user’s “My results” database, which in turn makes the layer available for use in other workflows.
Was this article helpful?
That’s Great!
Thank you for your feedback
Sorry! We couldn't be helpful
Thank you for your feedback
Feedback sent
We appreciate your effort and will try to fix the article